0
Step by step to add-on another domain for your blogger: Use free domain .co.cc and everydns.net
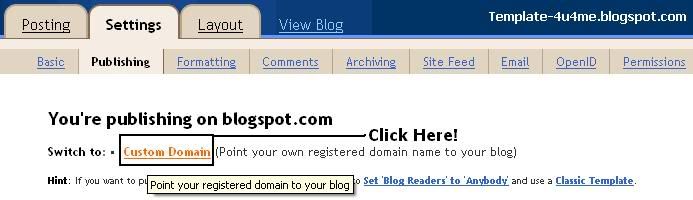
1. Login to your Dashboard, go to Settings --> Publishing and click Custom Domain:
2. You already have a domain. Click Switch to advanced settings

3. Input domain info and click Save settings:

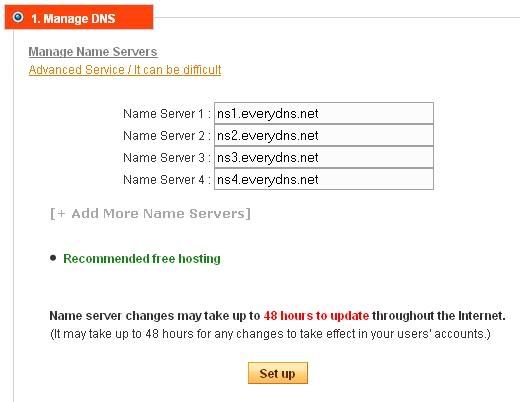
4. Go to the Your Domain control panel and edit DNS Name server :
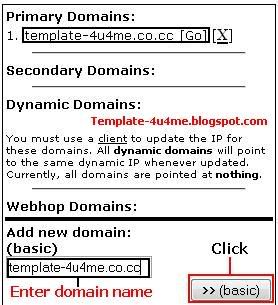
5. Go to everydns.net and login (if you don't have account you can register very easily). Enter the domain name into Add new basic domain and click to Basic button
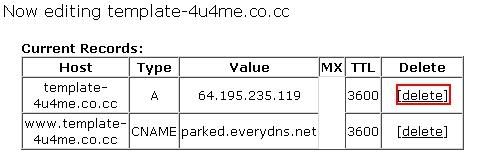
6. Click to domain name has been added, in the Current Records will appear as two records CNAME and A with the parameters of default. Your job is to remove items to A by clicking on the Delete button on your right.
At the Add a Record: www you fill in the box Full Qualified Domain Name, Record Type box select value is CNAME, and cell Record Value fill the ghs.google.com
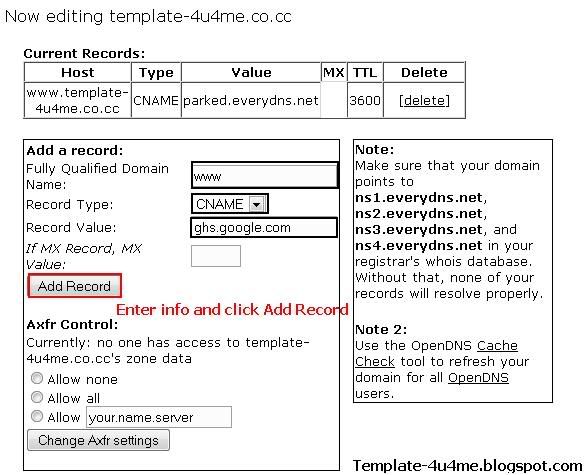
If successful, it will be like the following:

You mission is waiting to DNS update....and Done!
Note: If you have domain you can go to domain control panel and edit dns name server : ghs
Wish you success...!
1. Login to your Dashboard, go to Settings --> Publishing and click Custom Domain:
2. You already have a domain. Click Switch to advanced settings
3. Input domain info and click Save settings:
4. Go to the Your Domain control panel and edit DNS Name server :
5. Go to everydns.net and login (if you don't have account you can register very easily). Enter the domain name into Add new basic domain and click to Basic button
6. Click to domain name has been added, in the Current Records will appear as two records CNAME and A with the parameters of default. Your job is to remove items to A by clicking on the Delete button on your right.
At the Add a Record: www you fill in the box Full Qualified Domain Name, Record Type box select value is CNAME, and cell Record Value fill the ghs.google.com
If successful, it will be like the following:
You mission is waiting to DNS update....and Done!
Note: If you have domain you can go to domain control panel and edit dns name server : ghs
Wish you success...!
from phamen.com translated by Joker_H


Post a Comment